Partial obscurity is partial security
Revealing data through image stacking
I recently read an article about integrating Azure Active Directory into an application. This allows the former to host login duties for the latter. The article contained several screenshots showing where to find information to complete the integration. The author obscured sensitive information by using Microsoft's Paint app. and its airbrush effect. One screenshot, in particular, contained a shot of the endpoints needed to handle logins of various technologies (i.e. WS-Federation, SAML-P, OAuth 2.0). However, this shot contained repeating information–a GUID that is part of a URI. Because the author manually obscured this data, the pattern of the airbrush effect varied between each row of URIs. Individually, the GUID could not be recovered. However, by stacking cropped frames of each row (seven in total), I was able to retrieve eighty-nine percent of the GUID (thirty-two out of thirty-six characters). What follows is a brief tutorial of how this was achieved. In this particular case, knowing the endpoint is not a crucial security leak, but the point that should be remembered is: repeating data intended to be obscured must be fully obscured. A better approach is to just not include the sensitive data in a screenshot–delete the particular section.
Note: the screenshots in this post are not from the article described in this post. They are originals used for creation of this tutorial.
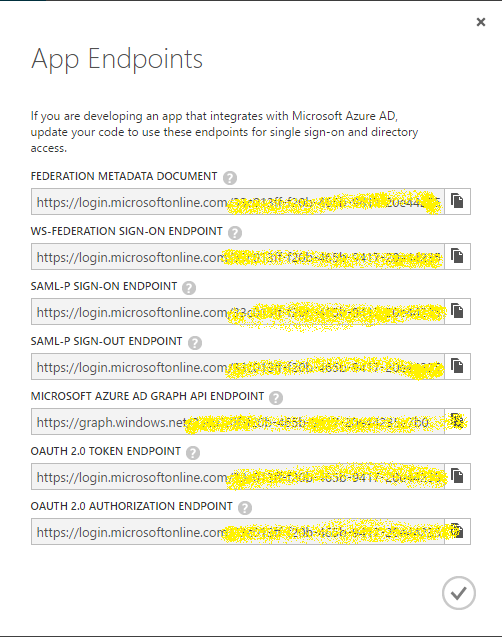
Here is our starter image. Looking at each row, it is difficult to decipher the data being obscured (which is normally a good thing). You can see various characters, but nothing provides a quick revelation. So, let us start framing each row and building our layers. The framing does not have to be perfect since we can do processing on the image later.
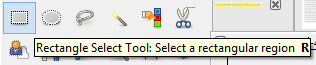
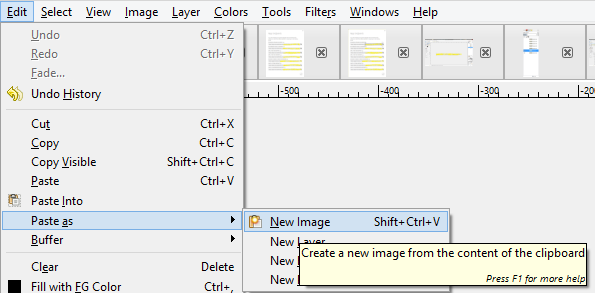
We use the selection tool to frame each row of data. The first frame is copied and then pasted as a new image:
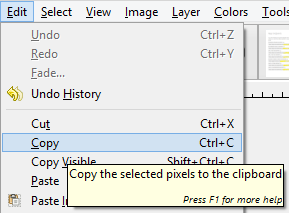
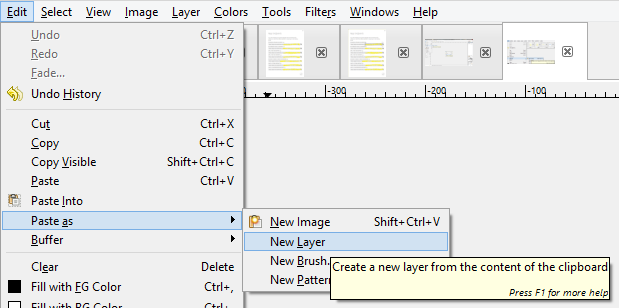
Additional frames are copied and pasted into our new image as new layers:
Once we frame all seven rows we also have seven layers:
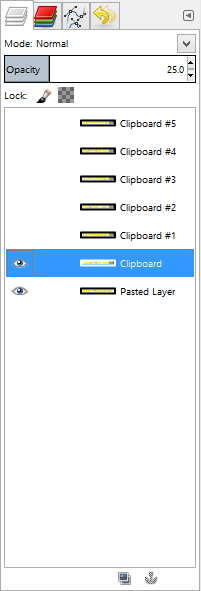
To get a better result, we want each layer to align. To do this we work one layer at a time. I prefer working bottom-up and start by turning-off all layers except the bottom two (see previous layer screenshot). Additionally, I set each layer's opacity to twenty-five percent so I can confirm the alignment (otherwise, the top-layer completely blocks the bottom-layer). Start by selecting the second layer and then the move tool. Next, drag the layer until it looks like the obscured data aligns with the obscured data from the previous layer. Repeat for the remaining layers, turning-on each additional layer so you can see it.


Once the layers have been aligned, we can now see how much more detail has been revealed:

And, here is the image enlarged (400 percent):

Lastly, revealing one-layer at a time:

While something may look obscured enough, if there are enough repetitions and random gaps, someone could stack the images to reveal the data. The data could span many sources–someone who is determined will find them. Based on this dataset, we can identity about ninety-seven percent of the GUID (thirty-five out of thirty-six characters). For further analysis, download the image file and play around with different opacity settings to get a better result. The file contains the seven pre-cropped images.
 Bill Boga